Author: – Sixty Four Duke64Nukem
Download the Example Map:
This tutorial will show how to make a static mesh move. In Duke Nukem Forever 2011 it doesn’t use the classic method of mover brushes for elevators or lifts etc. It uses a static mesh movement method. For a fun fact Duke Nukem Forever 2001 still used Mover brushes. But it was changed severely here.
-Okay let’s get started-
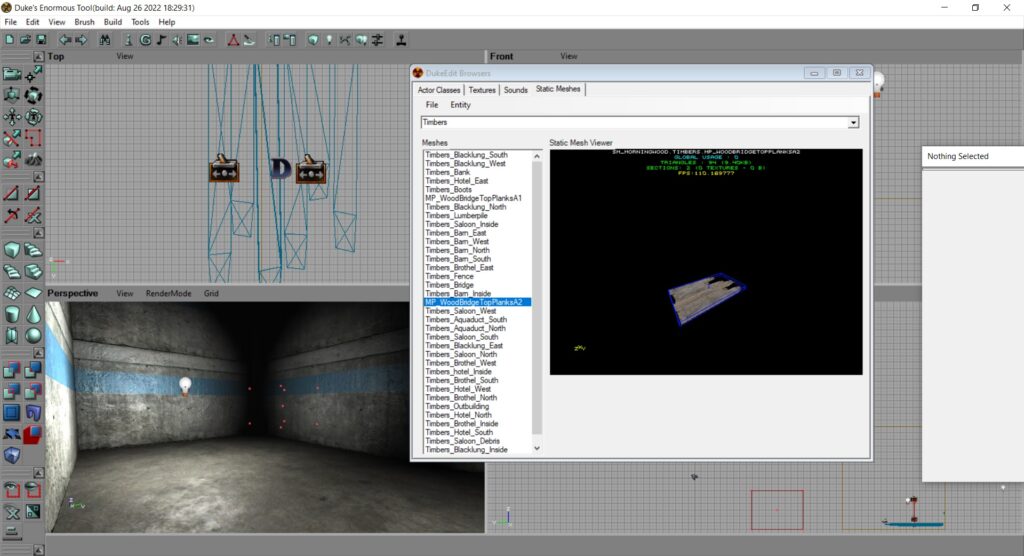
First thing you want to do is find a static mesh you can work with as a lift. Go to static mesh browser. And locate a mesh you want for the lift. In this case we go to open> sm_morningwood.dsm (Go to your gameroot and locate Static Meshes Folder ). We will select a random mesh in this example. Click on the mesh you want Make sure it’s highlighted. I’m selecting sm_morningwood.Timbers.MP_WoodBridgeTopPlanksA2 for this tutorial.
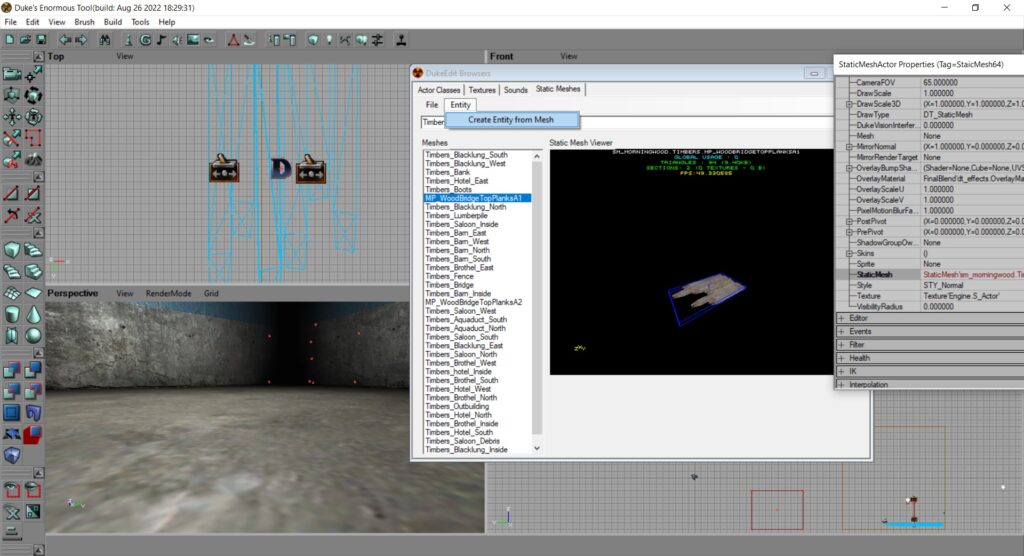
Go near the spot you want to place a mesh in the 3d visual view port. This is just for positioning a placement). On the static mesh menu press Entity>Create Entity From this mesh. If you went near the location you want this placement to be in the 3d view port view, it will go near the place you want it to be at (without having to move the object much for position.)
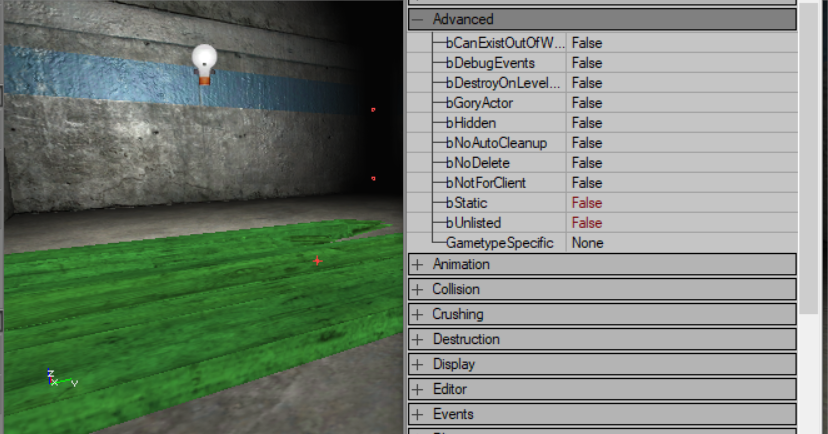
Double Click click on the placed Entity to bring up properties. And do these properties: Advanced: Static: False Unlisted: False (If it is marked as static it will never move. It cannot be static or unlisted)
While still viewing the mesh properties go to movement options: Use the drop down menu on Physics to select MovingBrush
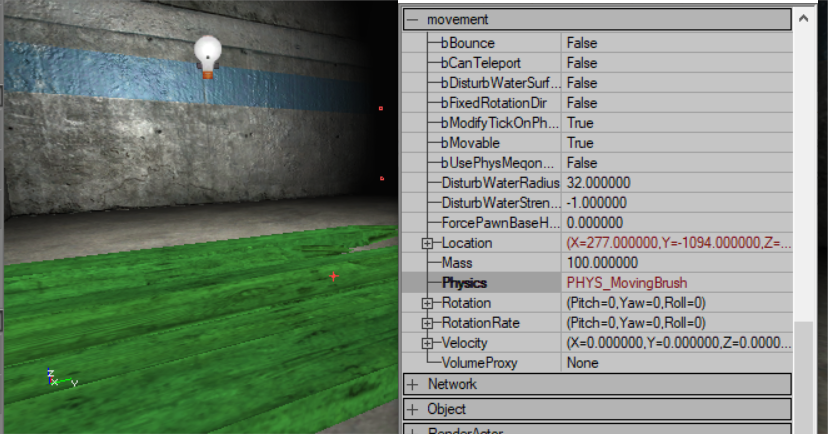
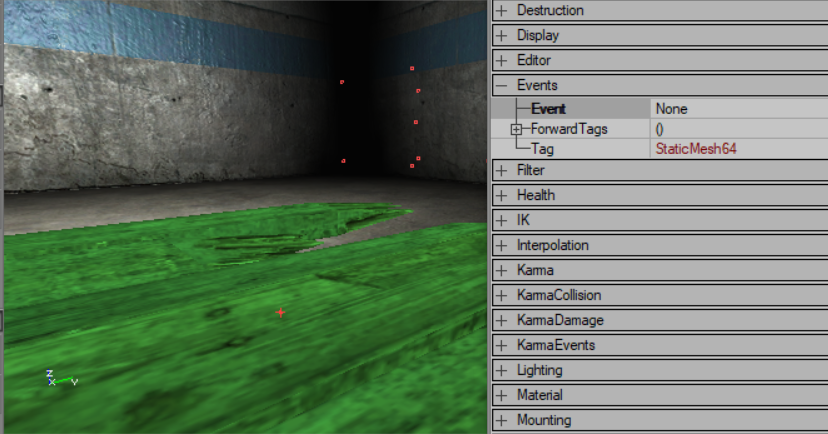
Finally on the Mesh properties go to Events: And set the tag to whatever you want to call the lift/elevator/mover. In this example I’m calling it StaticMesh64.
The static Mesh is fully ready to go. Now it’s time to setup the movement of it.
KeyframeDispatch:
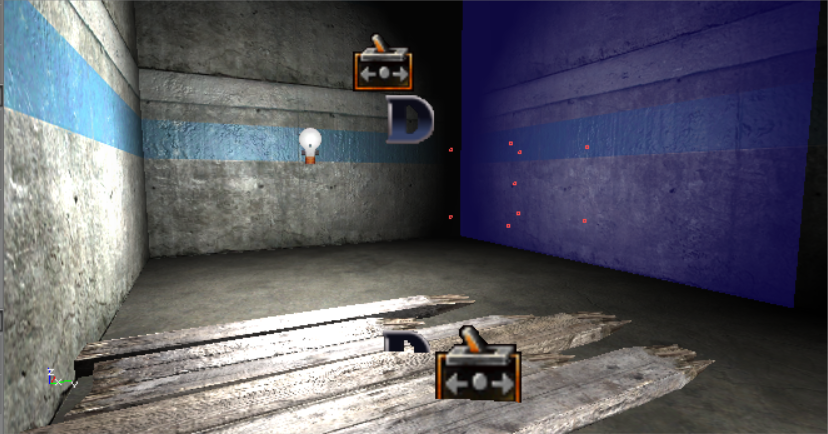
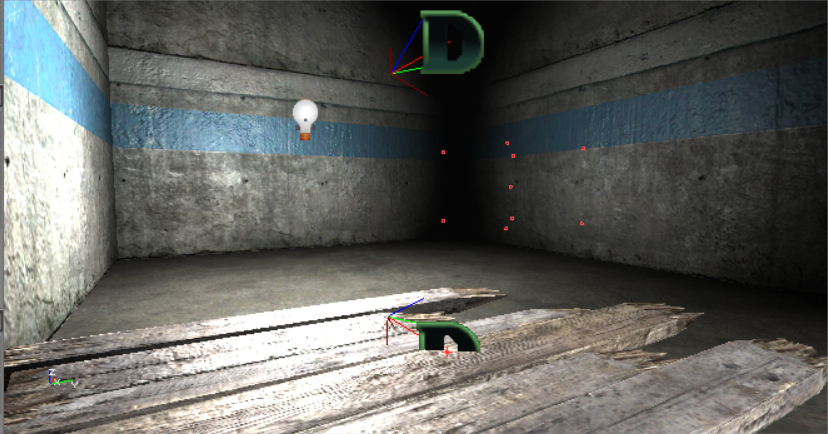
Go to the Actors browser: Locate ‘KeyframeDispatch” and select it by clicking. In the 3D View port click on the map location specifically where you want to place this entity, and on the Actor Browser press “File>Place Entity”. This will place a “D” sprite on your level on your selected position from 3d view port.
Double Click on the “D” sprite and go to properties for it. Go to Keyframelocation properties tab for D sprite. And set busetargetlocation to True. Then click on the TagetLocation menu and at the bottom set the Time Total to about 3-5. Now under KeyframelocationRules go to “UseMyPosition” and set as True. 
Stay on “D” sprite properties and go to Events properties tab. And set the event to the event of the static mesh tag. So on Events>Event put StaticMesh64 to match the mesh tag.
This “D” Sprite is your keyframe location so for this one put the tag as KeyframeDispatch64Down. This will stand for the down location of the movement. Put it near the location of the mesh mover keep it low to the ground. 
Now select the “D” Sprite and press ctrl+W. This will quick copy paste the actor/D sprite. Raise the new copy pasted “D” sprite upward by holding ctrl+left click and right click together and move upward in the 3d view port. This will move the copy pasted “D” sprite upward. This will be our upward location “D” Sprite keyrame. Go to Events and change the tag to “KeyframeDispatch64Up”. Since we copy pasted the “D” sprite all the other properties from previous steps will maintain.
Now we have to give these keyframes dispatchers. Hence why its called KeyframeDispatcher.
Dispatcher:
Go to actor browser and locate “Dispatcher”. Click on the map in the 3D view port, where you want to place the dispatcher and hit “File>Place Entity”. Double click on the Dispatcher and go to properties. Go to events properties and as the tag, type the matching event. In this case I will do: Dispatcher_Elevator64Down. This dispatcher is calling the downward position of the mesh. Now go to the Dispatcher>Dispatcher properties and got to “out events” press “add” this will add an event this dispatcher calls. Set it to the downward position “D” sprite tag. In my case: KeyframeDispatch64Down.
Click on the dispatcher Sprite and press ctrl+w to quick copy paste the dispatcher sprite. Go to ‘out events’ and change it the upward position “D” sprite ‘tag’. In my case: KeyframeDispatch64Up. This will control and trigger the movement position of the mesh upward.
Positioning “D” Sprites Hint Bonus:
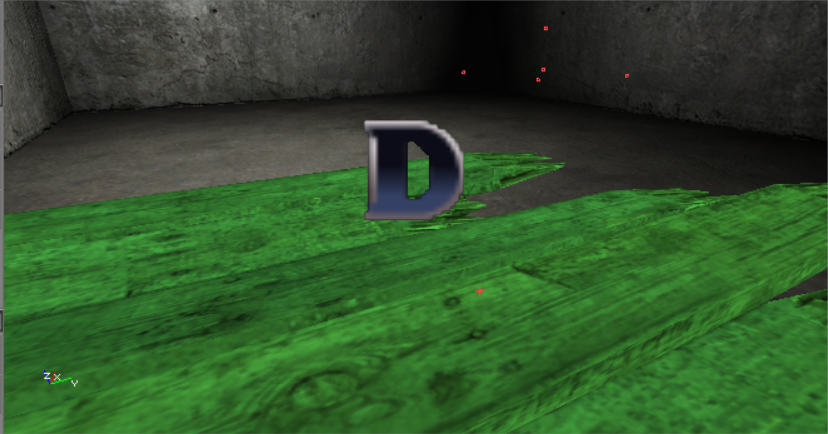
Click on the static Mesh and Locate it’s origin point. It will show a very small light red cross on every meshes origin point. This needs an example. I have the static mesh selected you can see the little light red cross. That’s an origin point of the mesh. We want to “try our best to align our “D” Sprite up with that origin point. Move it so the D is near the red cross.

Let’s add a switch to control the lift: Bonus:
You can trigger those tags in many ways but I will use a switch for the tutorial.
Go to actors browser and go to Switches. Choose a switch click on it. On the 3d view port select on the map near where you want it and press “File>Place Entity” to place the switch. Rotate it and position it where you want it. Double click the switch and go to properties. Go down to Switchinfo > SwitchUserStates.
Add two user states. On the first user state we want to set it to the initial location (up or down). If this elevator is initially located on the downward position, put the 0 state as downward. In my case: Dispatcher_Elevator64Down.
As state 1 put the event as Dispatcher_Elevator64Up. This means when you hit the switch it will change to the second state and send the mover mesh upward.
I hope this helps some.